
Quick guide to start using Gmedia Gallery
To install Gmedia Gallery plugin go to WordPress dashboard -> Plugins -> Add New. Search Gmedia Gallery and click Install button.
There are few ways to add content to Gmedia Library:
- Upload from computer or mobile device.
- Import server’s folders.
- Import from other gallery plugins. Supported plugins are “GRAND Flagallery” plugin, “NextGen” plugin. Image titles and descriptions will be imported as well.
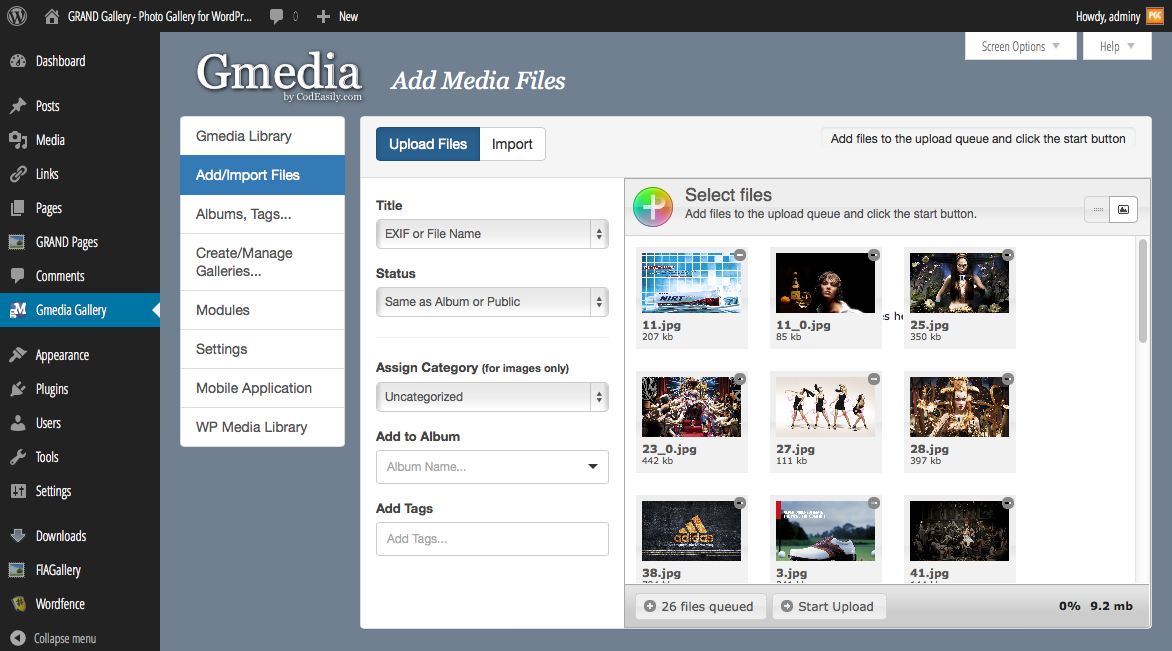
Upload Files to Gmedia Library
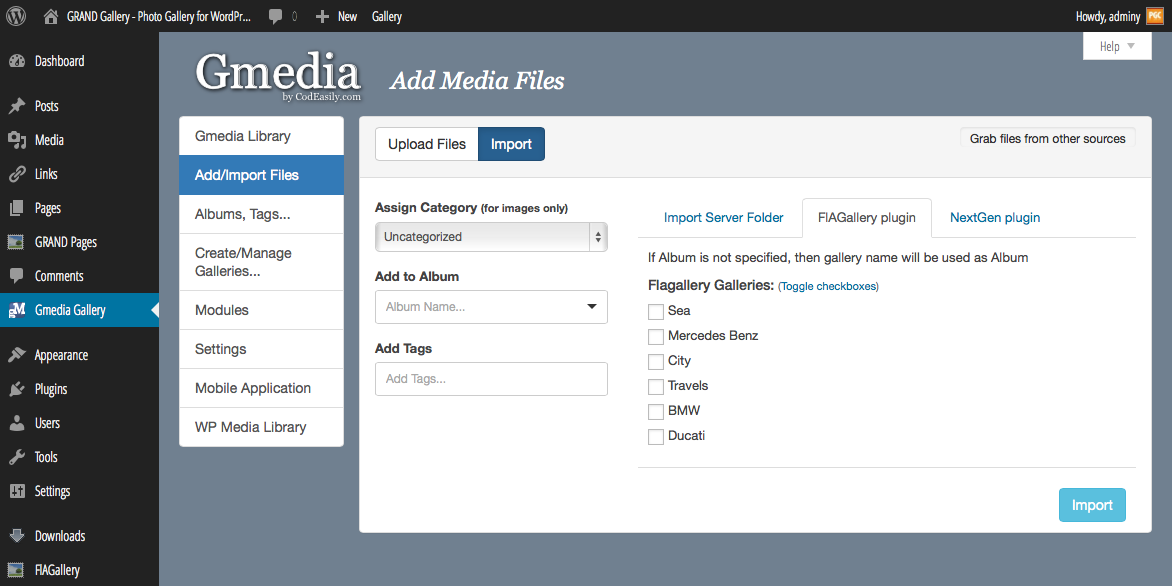
Import from server’s folder and other plugins
Gmedia Gallery plugin allows you to combine your media content in collections. There are three common types of collections – Category, Album and Tag. Each type of collection has it’s own function and features:
- Categories are static list of virtual folders for fast and coarse sorting. One file can be only in one Category.
- Albums are the most complicated type of collections that have much more options. For each Album you can add Description, set visibility Status, order items in way you need. Also each Album linked to author who created it. One file can be only in one Album.
- Tags are the most flexible and easy way for creating collections. One file can have multiple tags.
Note: One file can be in one Album, in one Category and have multiple tags at the same time.
Visibility Status in Gmedia Gallery can be set for Files and Galleries as well as for Albums.
Status Public means that any visitor of your website can see this item on the page or in iOS application (if GmediaService is active).
Items with Status Private will be visible only for logged in visitors.
Items with Status Draft can be viewed only via admin pages. Draft items visible only to owner of these items.